
I love Valentine's Day, mostly because it's one of the few times I see handmade cards exchanged. Here a a couple of DIY Stemapunk Valentine's Day cards that are easy & cheap to reproduce. As always, merry making!
 The Valentine's Day Magnifies My Love for You Card
- Plain card & envelope (your choice of color)
- Bakers Twine (your choice of color)
- Small Magnifying Glass
- Small Heart Stamp (or you can draw your heart)
- Scissors, pink or red marker & Pen
Total Cost: approximately: $3.50
- Using your pink or red marker color in your heart stamp and then place the stamp firmly onto the middle of your card. If you are drawing your heart, draw it in the center of your card. Be careful not to draw your heart larger than your magnifying glass.

- Place your magnifying glass on the card over your stamped/ drawn heart. Make two tiny dots with pen on both sides of the magnifying glass. This tells you where to poke holes in the card. You want your holes to be close to your magnifying glass's hook or ring.
- Poke out your holes where you've already marked.
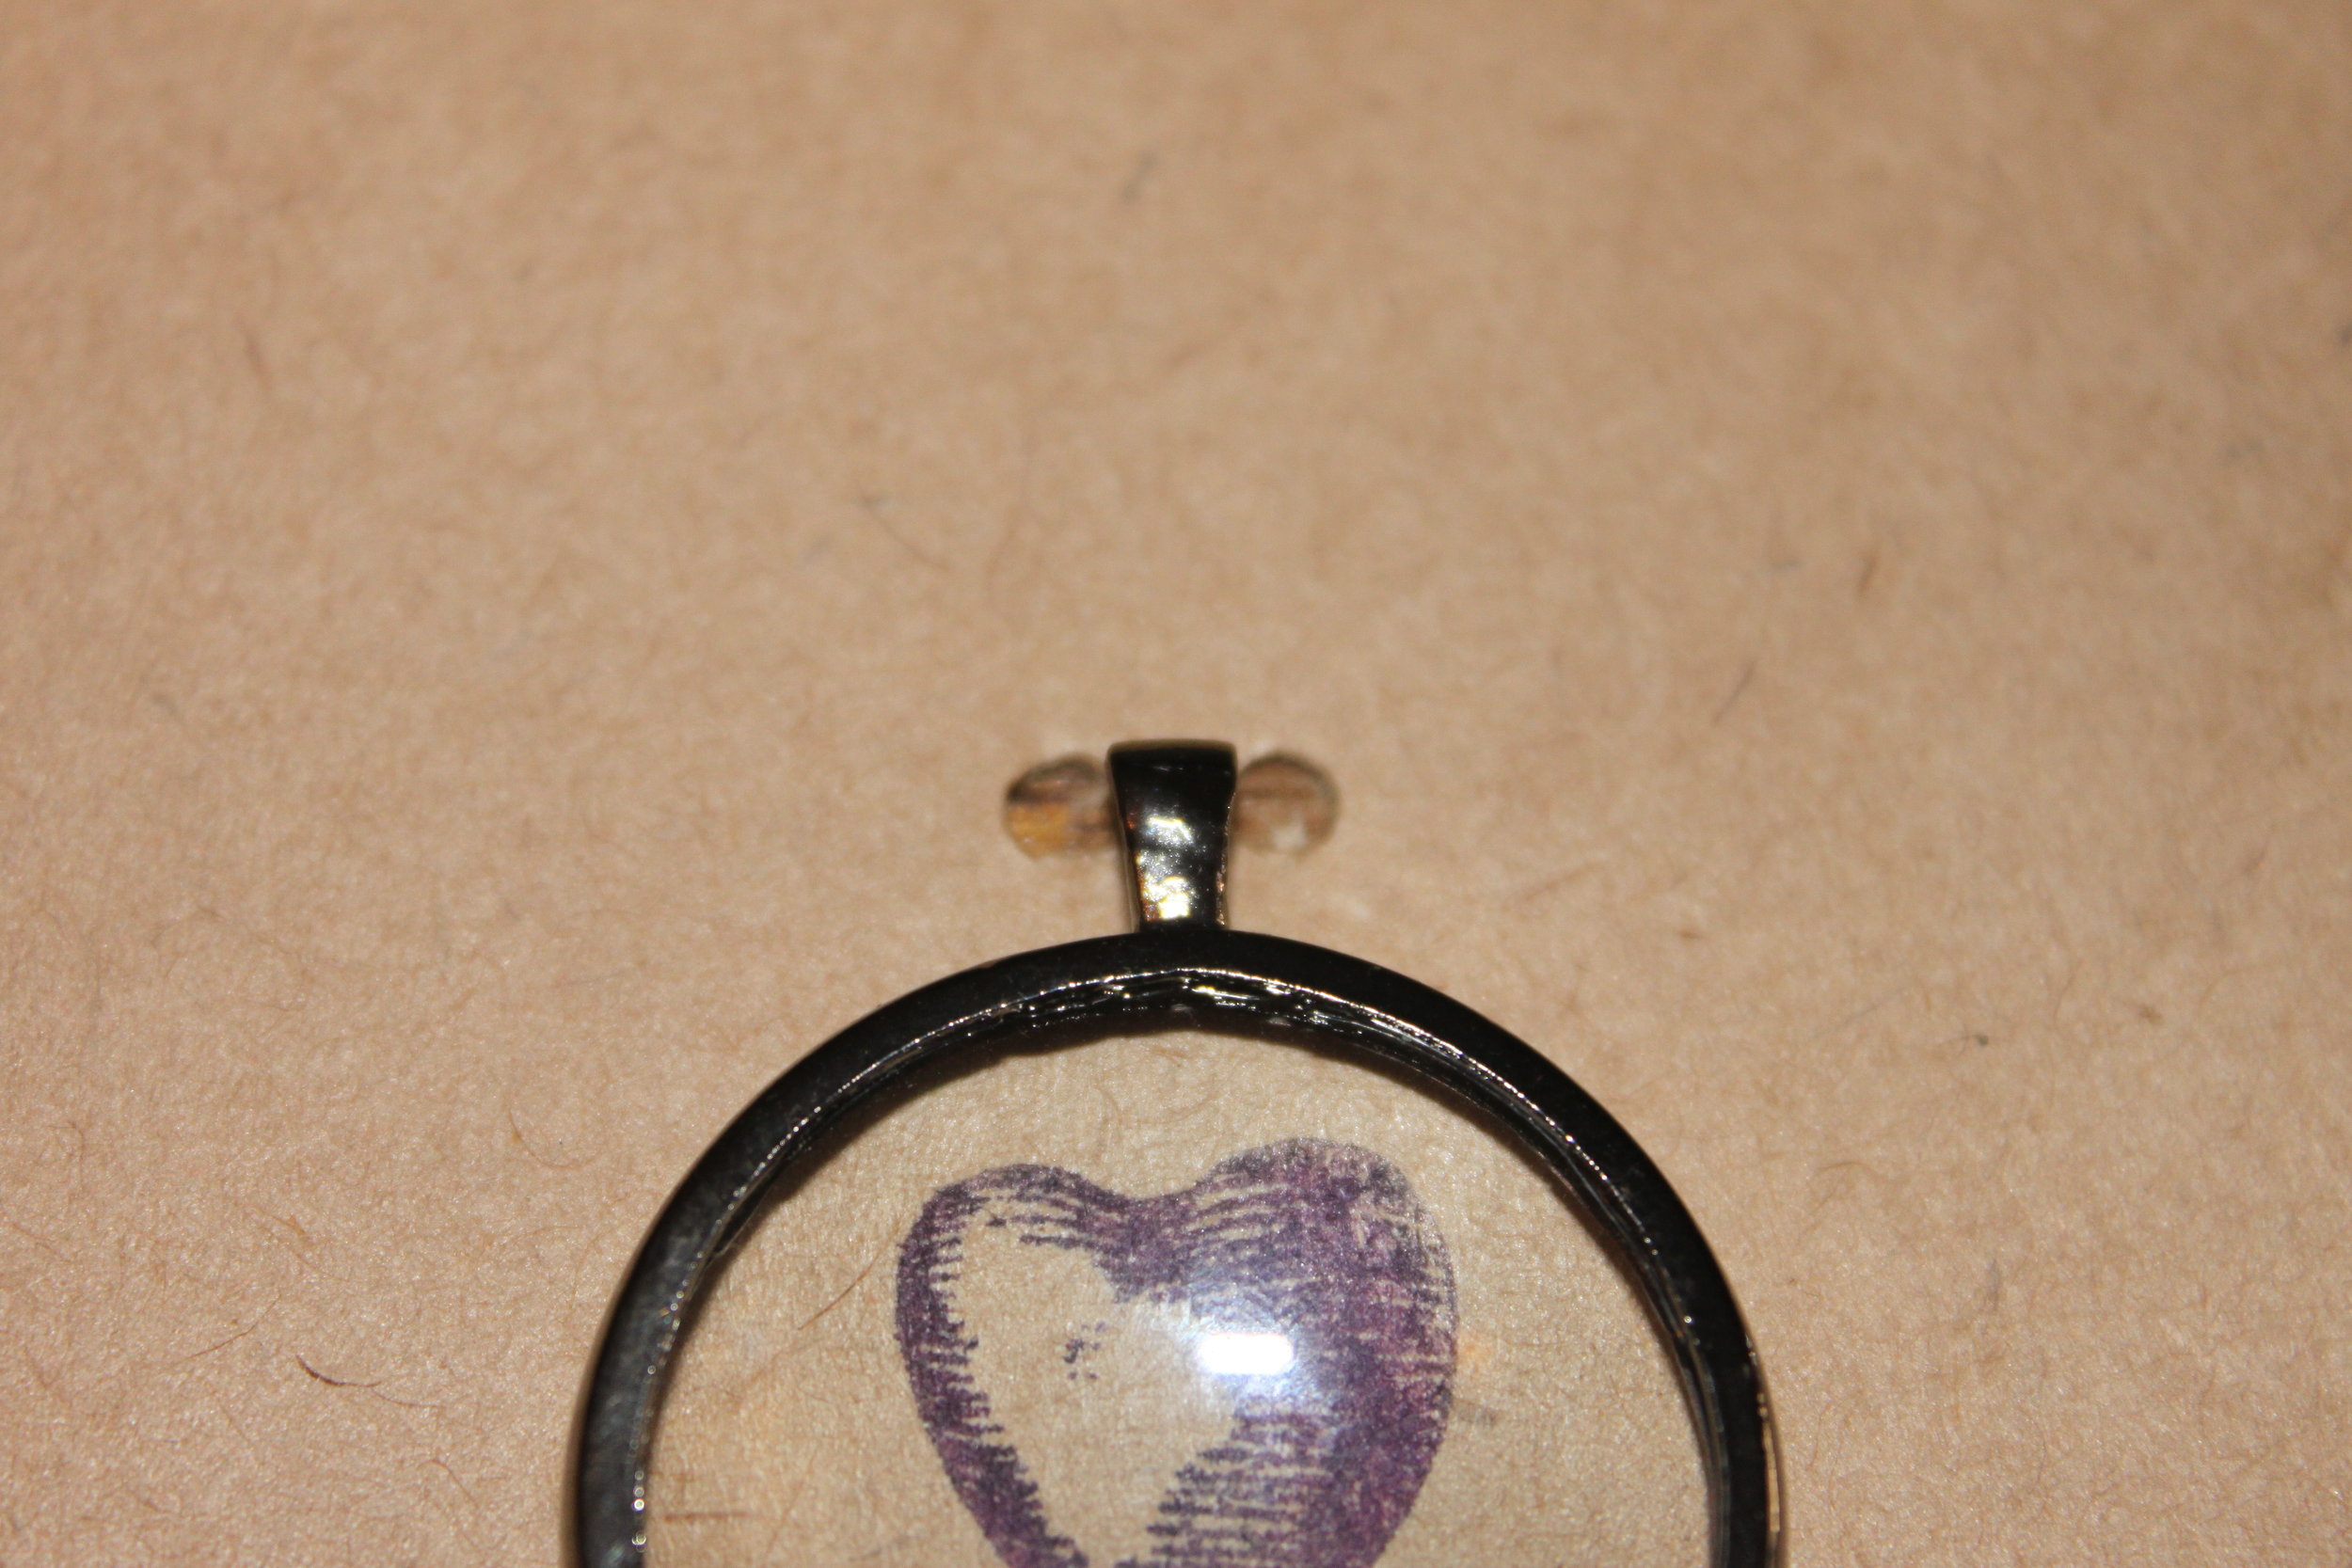
- Cut a length of bakers twine (approximately 1 inch) and thread it through your paper so that both ends meet at the front of your card.

- Next thread the twine through your magnifying glass's hook. The twine on the left should thread to the right and vice versa.
- Tie a knot securely on the front of the magnifying glass's hook. And then tie a decorative bow. Cut off any excess twine.
- Last, write your message & the card's quirky phrase: "Valentine's Day magnifies my love for you."
The You Really Get My Gears Going Card
- Plain card & envelope (your choice of color)
- 3 gears (I used reproduction gears which you can purchase at Michaels in their jewelry section)
- 3 brads (also available at your local craft store in the scrapbooking section)
- Scissors & Pen
Total Cost: approximately $1.75 
- Place your gears on your card. Figure out which placement you like best.
- Once you've got your gears where you want them, mark the center of each gear with your pen. A small dot will do.
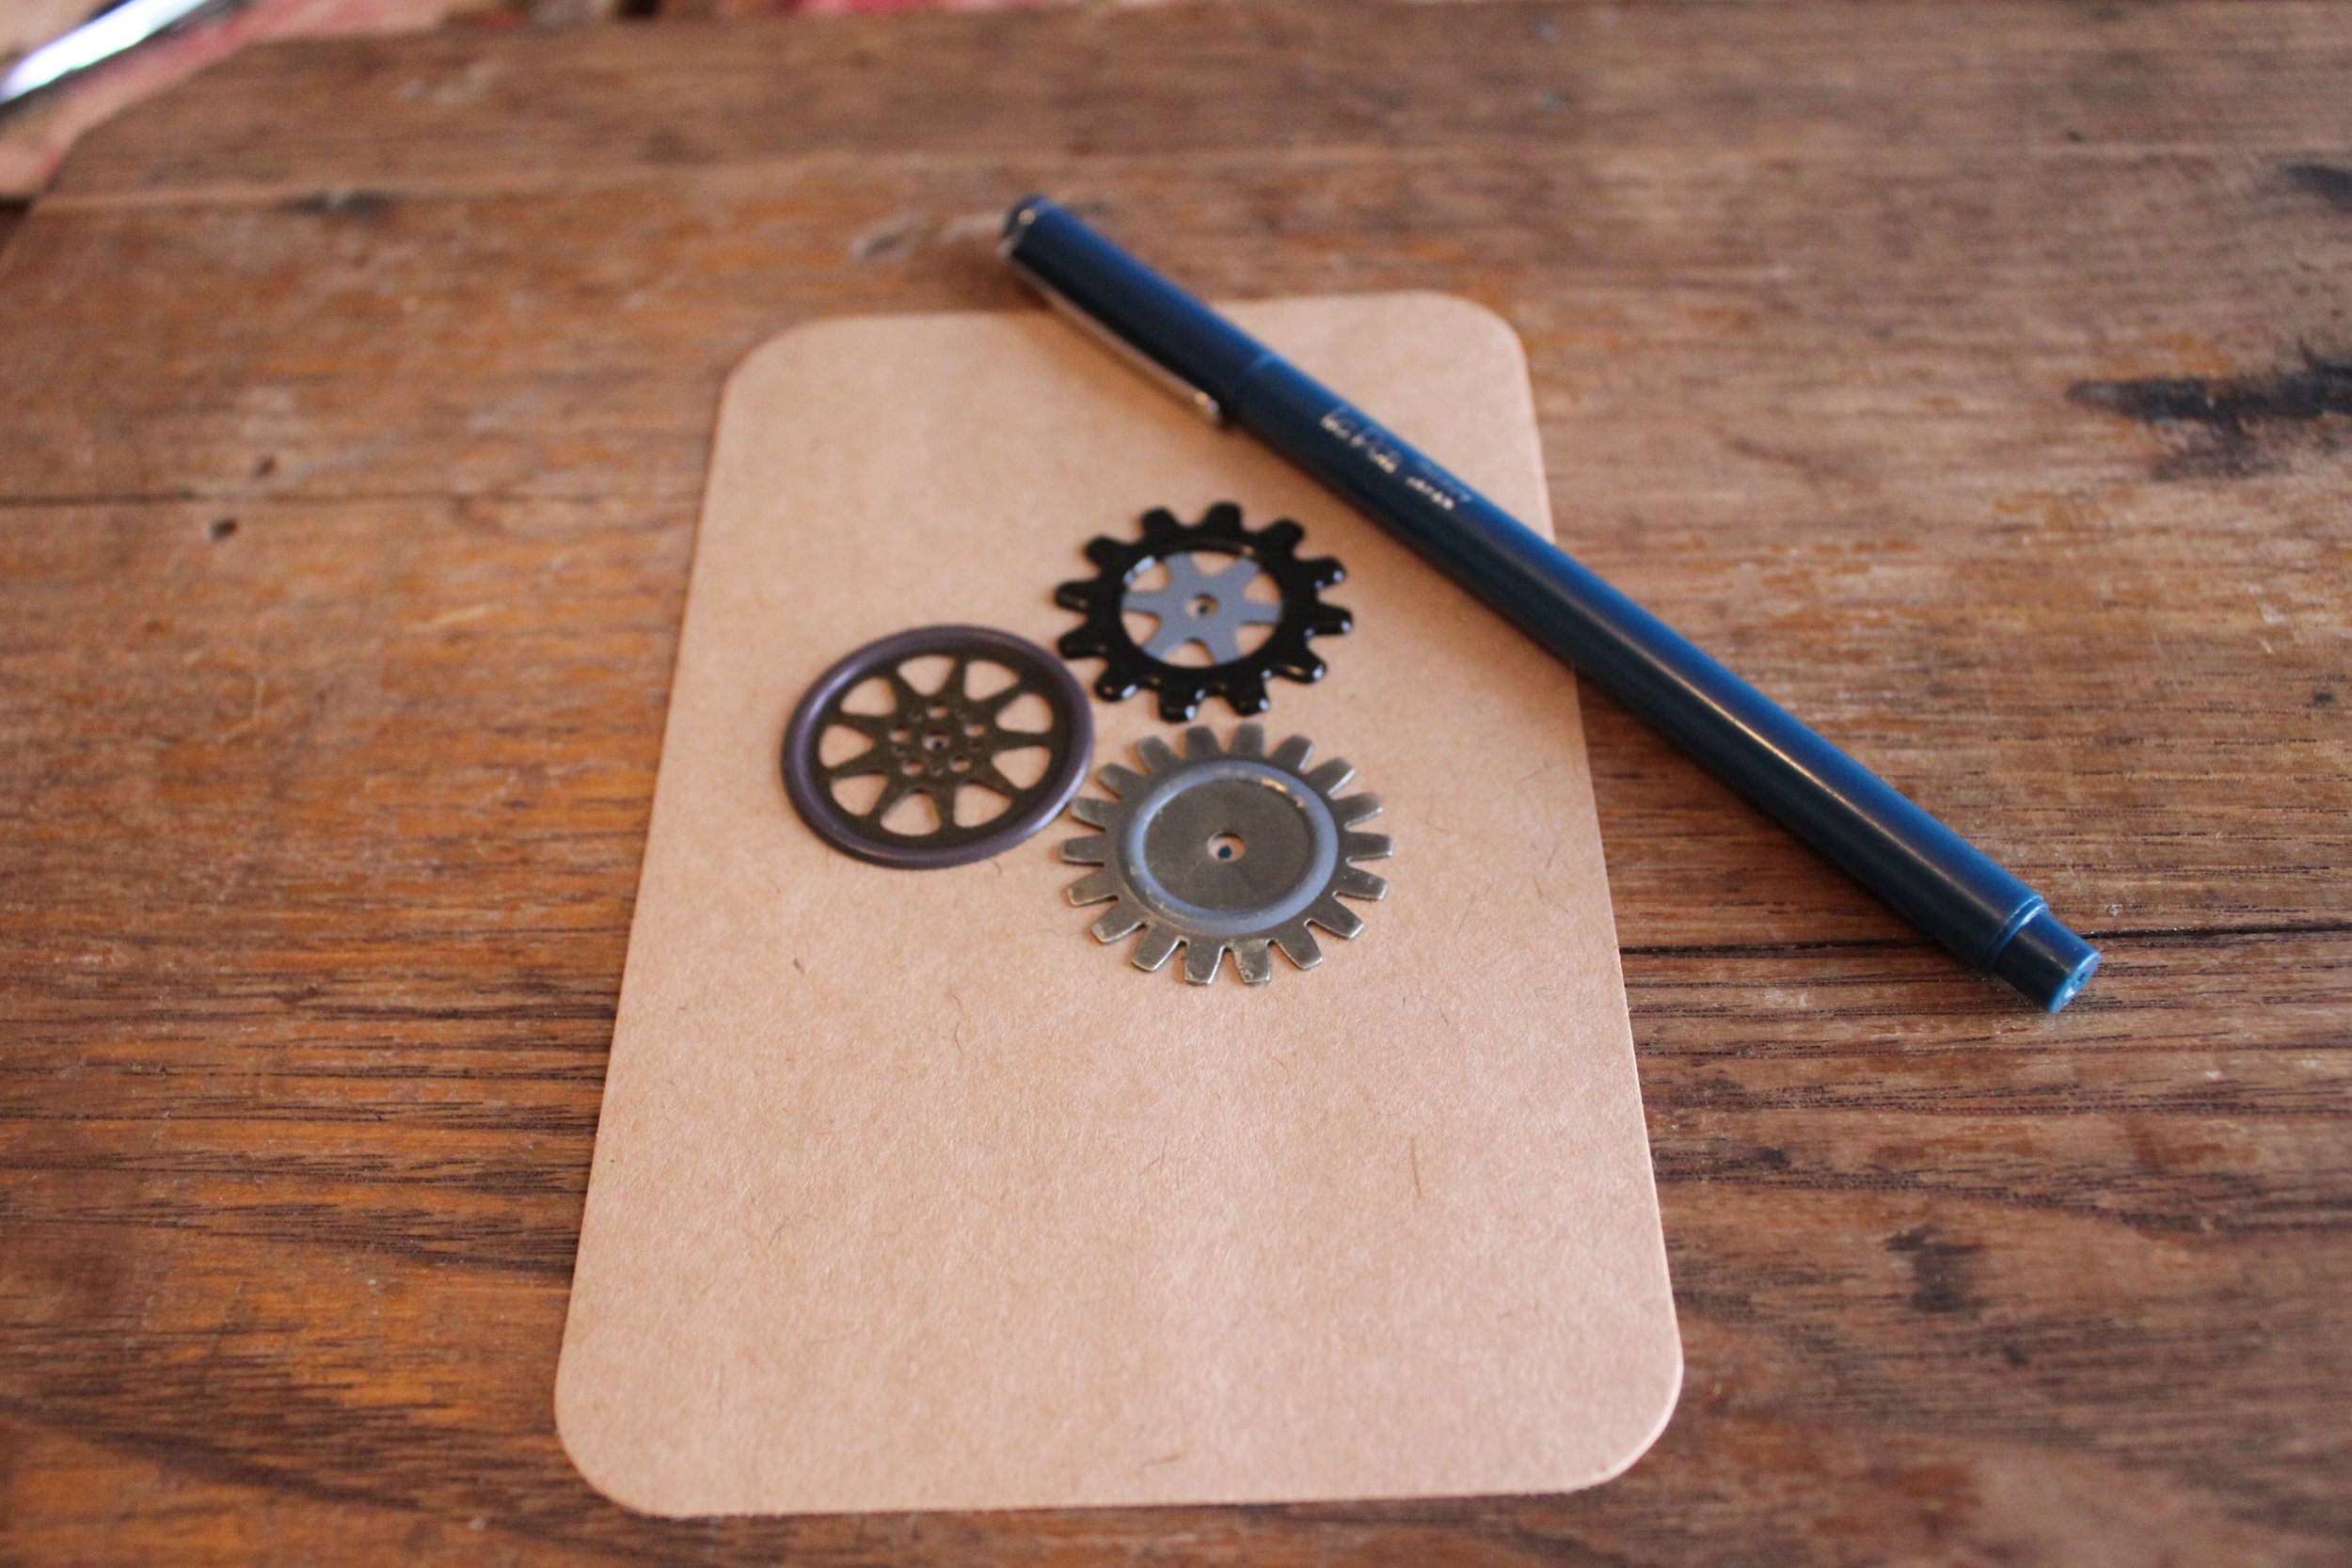
- Next, poke holes in your card with your scissors. Be sure not to make a large hole, a small one is sufficient.

- After you've finished making all of your holes, affix each gear to the card with a brad. To do so, place your gear (face up) onto your bard and then through your card. Place your thumb over the brad to hold it firmly in place and pry the brad's 2 metal prongs out. Repeat for each gear.

- Last, write your message of love and the card's fun little phrase: "You really get my gears going."
The You are the Gear that Keeps my Heart a Pumping Card
- Plain card & envelope (your choice of color)
- 1 gear (I used a reproduction gear which you can purchase at Michaels in their jewelry section)
- 1 brad (also available at your local craft store in the scrapbooking section)
- A Heart Stamp (or you can draw your own heart)
- Scrap piece of paper (to stamp the heart on)
- Scissors, pink or red marker & Pen
Total Cost: approximately 80 cents
- Stamp (or draw) the heart onto your scrap piece of paper. Once you are done, cut it out. Poke a hole in the center of your heart using your scissors. Set aside.
- Poke a small hole in the center of your card.
- Next load your brad with the following (in this order): heart cut out, gear, and card.

- Close the brad by placing your thumb over it to keep it firmly in place and pry the brad's 2 metal prongs out.
- Last write your message of affection and the card's fun phrase: "Happy Valentine's Day" and "You are the gear that keeps my heart a pumping."
The I Only Have Eyes for You Card
- Plain card & envelope (your choice of color)
- Glasses (just the front piece of the frame, or a monocle would work too)--local thrift stores have tons of old frames so check them out first if you don't have a broken pair lying around the house
- Embroidery thread & needle
- An "XOXO" Stamp (or you can write "XOXO" yourself)
- Scissors, pink or red marker & Pen
Total Cost: (depends entirely on the glasses you chose and their cost) for mine, $8.00 
- Place your glasses on your card.
- Once you're happy with the placement of your glasses color one half of your "XOXO" stamp with your pink or red marker (so only one "XO"). Flip up your frame and stamp the "XO" where the lens is on your card. Repeat for the other lens.

- Next, thread your needle and secure your eyeglasses frame to the card by threading it through available holes. Be careful to keep your stitches neat, small, and close. Knot on the back side of your card. Repeat for another hole on your eyeglasses frame. You should stitch your frame securely in at least 2 places.
- Last write your message of adoration and the fun little phrase: "I only have eyes for you."
Have fun telling those you love just how much you love 'em. If you want more ideas for DIY Valentine's Day Cards check out my post from last year where I use upcycled items readily available around your home.