These candlesticks are perfect for hosting an intimate dinner party for fantastical inventors, airship tinkerers, clockmakers' sons & daughters, and bicycle enthusiasts everywhere!
 D.I.Y.s and Materials needed for each candlestick are written below under their respective name. Before you begin, I would like to note that in each of these photos a tea candle is pictured. I did not have a candlestick on hand and so I substituted a tea candle for a candlestick in order to show each step completely. As always, happy making!
 Atomventor's Candlestick Holder
Mason jar, medium sized bicycle gear (from a cassette), glass candlestick holder, a candlestick, and various odds & ends of your choosing to place inside your jar.
I used washers, springs, bicycle brakes, clock parts & gears.
A note on your mason jar & glass candlestick holder: These items must be able to stack inside one another. When purchasing your jar and candlestick holder, you should bring your bicycle gear with you to the store to ensure that you purchase the correct sizes.
Steps:
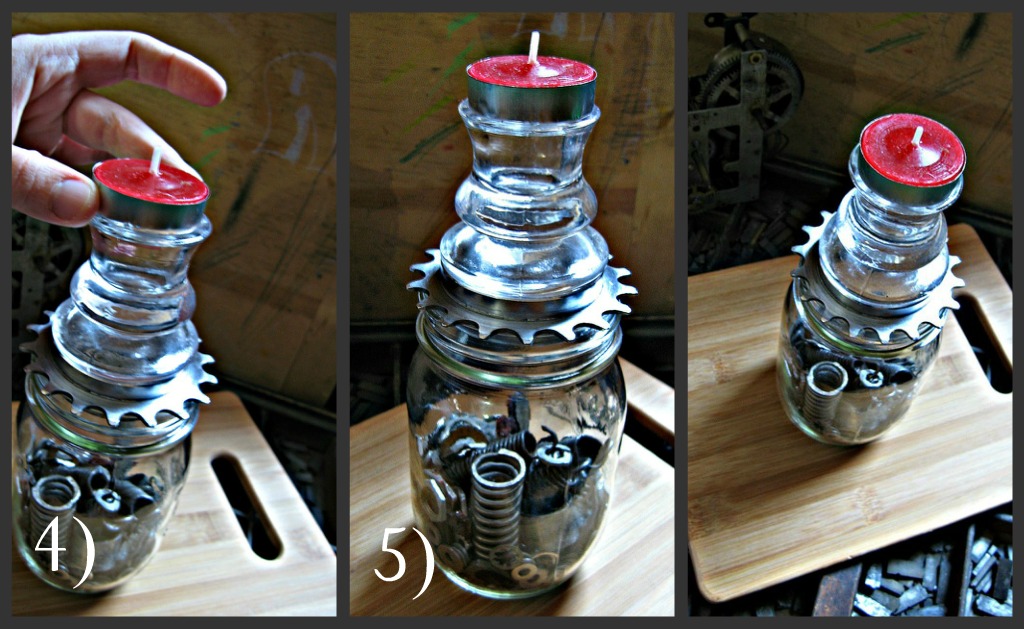
 1) Fill your jar with your assorted odds & ends (also known bric-a-brac, couch treasure, & dumpster delights). Fill your jar about halfway.
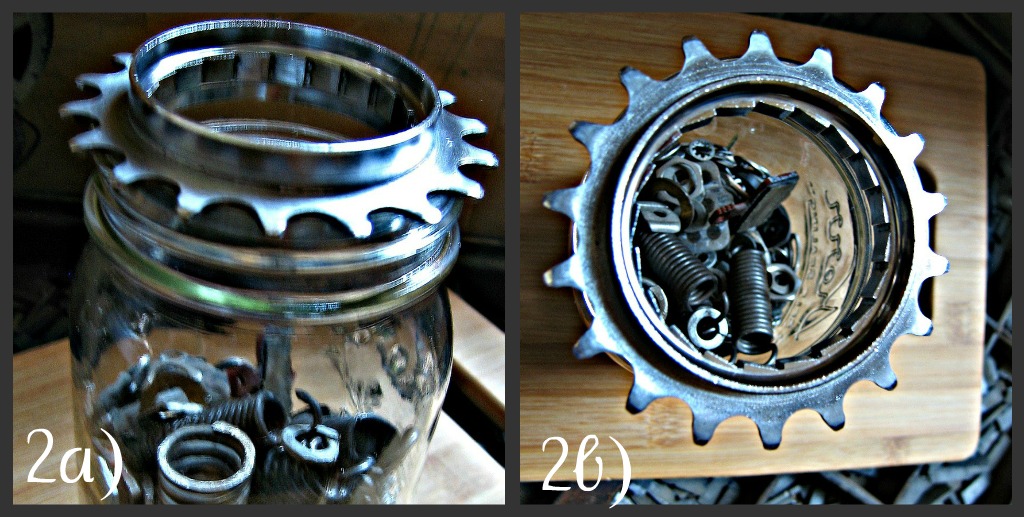
2) Place your bicycle gear atop your jar. See also figures 2a & 2b below.
 3) Place your glass candlestick holder on top of your bicycle gear. The candlestick I purchased (from Michaels) has a tiny "lip" on the bottom--this keeps the candlestick from falling off of the gear & sliding out.
 4) Next, place your candlestick into the glass candlestick holder.
5) Enjoy your handmade illumination!
 Simply Steampunk Candlestick Holder
Medium-sized bicycle gear, glass candlestick holder, and a candlestick.
A note on your glass candlestick holder: This item must be able to stack inside your gear. When purchasing your candlestick holder, you should bring your bicycle gear with you to the store to ensure that you purchase the correct size.
Steps:
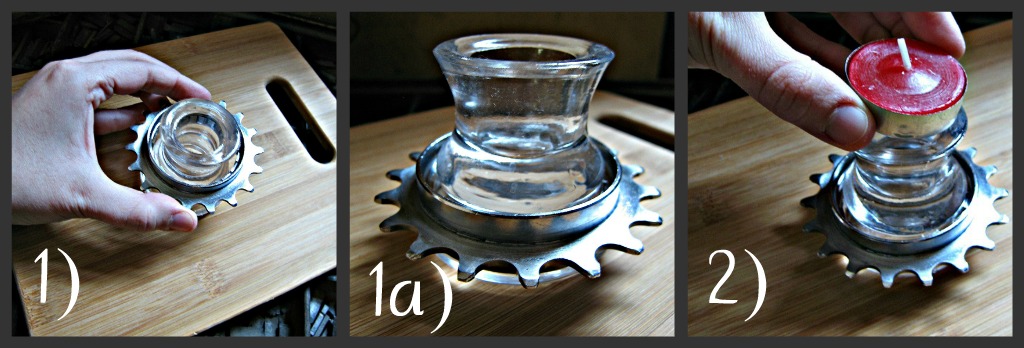
 1) Place your bicycle gear over your glass candlestick holder. You can see in figure 1a that the candlestick's "lip" keeps the gear in place.
2) Next, place your candlestick into the glass candlestick holder.
 3) Enjoy your handmade illumination!
 Simply Steampunk Easy Candlestick Holder
Medium-sized bicycle gear, glass candlestick holder, and a candlestick.
A note on your glass candlestick holder: This item must be able to stack inside your gear. When purchasing your candlestick holder, you should bring your bicycle gear with you to the store to ensure that you purchase the correct size.
Steps:
 1) Place your bicycle gear on your table and then stack your glass candlestick holder on top of it. Again, the "lip" of teh candlestick holder keeps the gear in place & from sliding. See figure 1a.
2) Next, place your candlestick into the glass candlestick holder.
 3) Enjoy your handmade illumination!
This D.I.Y. is versatile--once you have the materials you will be able to make each of these candlesticks. Since the candlesticks are made by stacking pieces into one another, you will also be able to change them to fit the mood or theme of your table setting.


