6 Different Steampunk Curtain Tie DIYS to subtly transform your decor! Materials & Tools are listed below by project. So let's get to makin'!
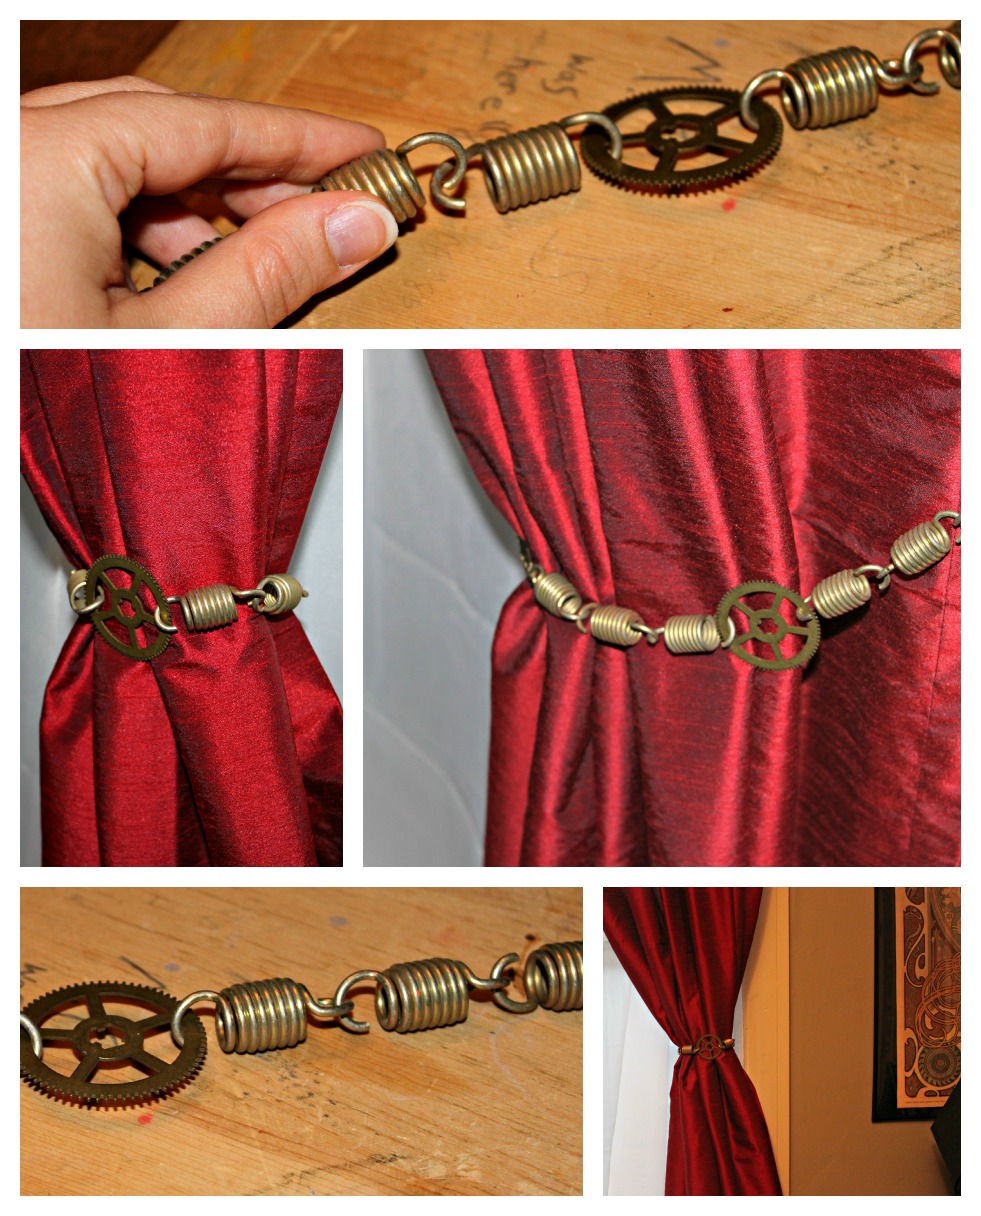
 Spring & Gear Steampunk Curtain Tie
- 8-12 springs (depending on the thickness of your curtain)
- Grandfather clock gear
- Flat nosed pliers & jump rings
- Link the springs together. (My springs are open ended, but if yours are closed ended connect your springs with a jump ring using your flat nosed pliers.) Link 4-6 springs together then add your grandfather clock gear.
- Next, add the remaining 4-6 springs to your gear & spring chain.
- Gather your curtain and place your spring & gear chain around it, connecting the two spring ends. (Again, mine are open ended so connecting them was simple; however, if your springs are closed ended, use a jump ring as detailed in Step 1.)
Skeleton Key & Chain Steampunk Curtain Tie
- Skeleton key
- Chain
- 4 jump rings
- Flat nosed pliers
- Measuring tape
- lobster claw or hook
- Gather your curtain and measure out how much chain you need. Cut the amount needed.
- Add your lobster claw or hook to the end of your chain using a jump ring and your flat nosed pliers.
- Next, attach your skeleton key to your chain wherever you desire using your jump rings and your flat nosed pliers.
- Last, gather your curtain and place the chain around it and secure by connecting your lobster claw or hook to the last loop of your chain.
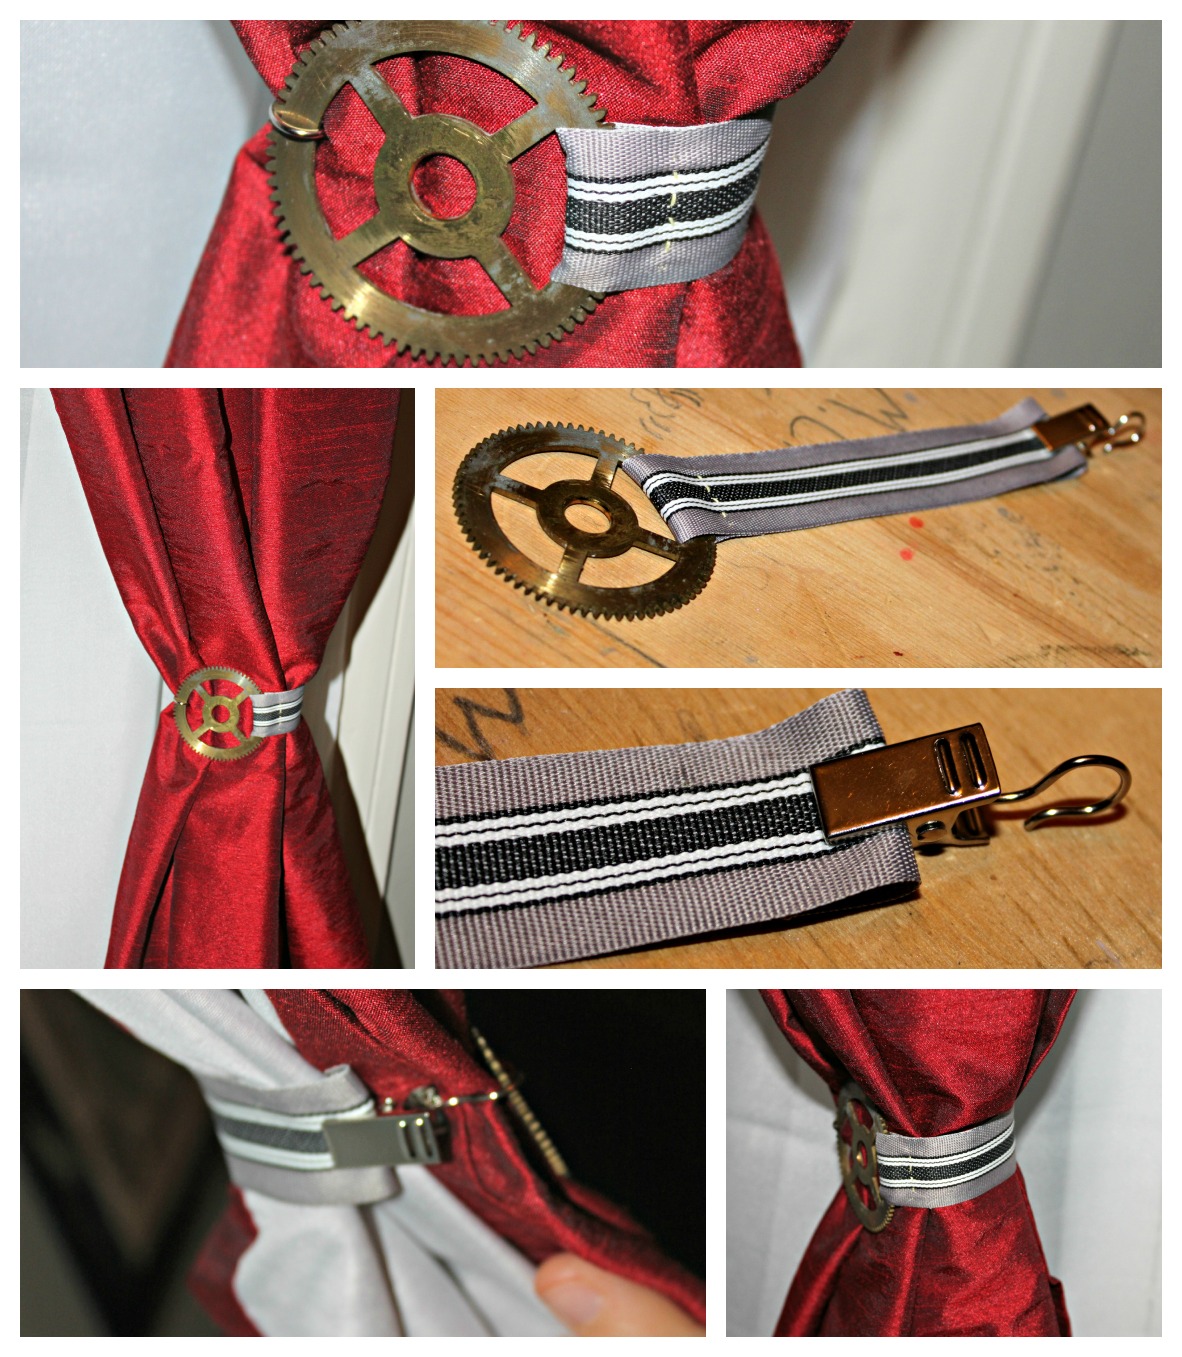
Ribbon & Gear Steampunk Curtain Tie
- Ribbon
- Grandfather clock gear
- Needle & thread
- Scissors
- Clamp-hook
- Measuring tape
- Gather your curtain and measure its gathered width. Add a 1/2 inch. This width will equal the length of your ribbon.
- Cut your ribbon to your needed length.
- Next, fold one end of your ribbon around your grandfather clock gear. This is where your 1/2 inch allowance is used.
- With your needle & thread, sew the fold in place. Be sure to tie a sturdy knot. Cut off the excess thread.
- Place your clamp-hook on the other end of the ribbon.
- Gather your curtain once again and wrap the ribbon around it. Secure the tie in place by fishing the hook onto your gear.
Lightbulb, Velvet Ribbon & Gear Steampunk Curtain Tie
- Velvet ribbon (or an old choker: if you do use an old choker you can skip ahead to Step 3)
- Grandfather clock gear
- Chain
- Wire & wire cutters
- Flat nosed pliers
- Scissors
- Measuring tape
- Lightbulb or (lightbulbs)
- 2 ribbon ends (or crimps)
- 4 jump rings
- Gather your curtain and measure its gathered width. Next measure your gear. Subtract your gear's width from your curtain width. This width is equal to the length of your ribbon.
- On each end of your velvet ribbon, place a ribbon end (or crimp) using your flat nosed pliers.
- Attach your gear to one end of your velvet ribbon with a jump ring using your flat nosed pliers. Set aside.
- For this step you'll need wire and wire cutters. Grab your lightbulb and begin wire wrapping its base. Be sure to create a loop so that you can connect the lightbulb (or lightbulbs) to your gear (and/or chain). Cut off excess wire.
- Connect your lightbulb to your gear using a jump ring and your flat nosed pliers (through the wire loop). Optional: you can attach another lightbulb to your gear. I suggest attaching the 2nd lightbulb to chain and then attaching the chain to your gear. It will give your curtain tie another added dimension.
- Last, wrap your velvet ribbon (or choker) around your gathered curtain and secure by connecting the loose end of your ribbon to the other side of your gear with a jump ring using your flat nosed pliers.
Clamp, Chain & Gear Steampunk Curtain Tie
- C-Clamp
- Grandfather clock gear
- Chain (approximately 1-2 inches)
- 2 jump rings
- Flat nosed pliers
- Attach your grandfather clock gear to the middle of your c-clamp with a jump ring and flat nosed pliers.
- Next, attach your chain to the bottom of the gear with a jump ring and flat nosed pliers.
- Attach the loose end of the chain to the hoop part of the c-clamp with a jump ring and pliers.
- Gather your curtain and hook your c-clamp around it. Last, clamp your curtain in place.
Clamp Simply Steampunk Curtain Tie
- C-Clamp
- Gather your curtain and position your c-clamp around it.
- Screw closed!
Enjoy your fabulous Steampunked Curtains!


