If you have a steampunk crafty business, or perhaps an old-timey aesthetic, your booth should help convey the feeling of your products. This is something I feel that I do quite well and I am quite proud of. Many people stop by my booth just to look at the curiosities inside. In my next 3 blog posts, I will be sharing 3 of my newest displays with instructions & tips on how to recreate them for yourselves! Here's no. 1.
Display No. 1:

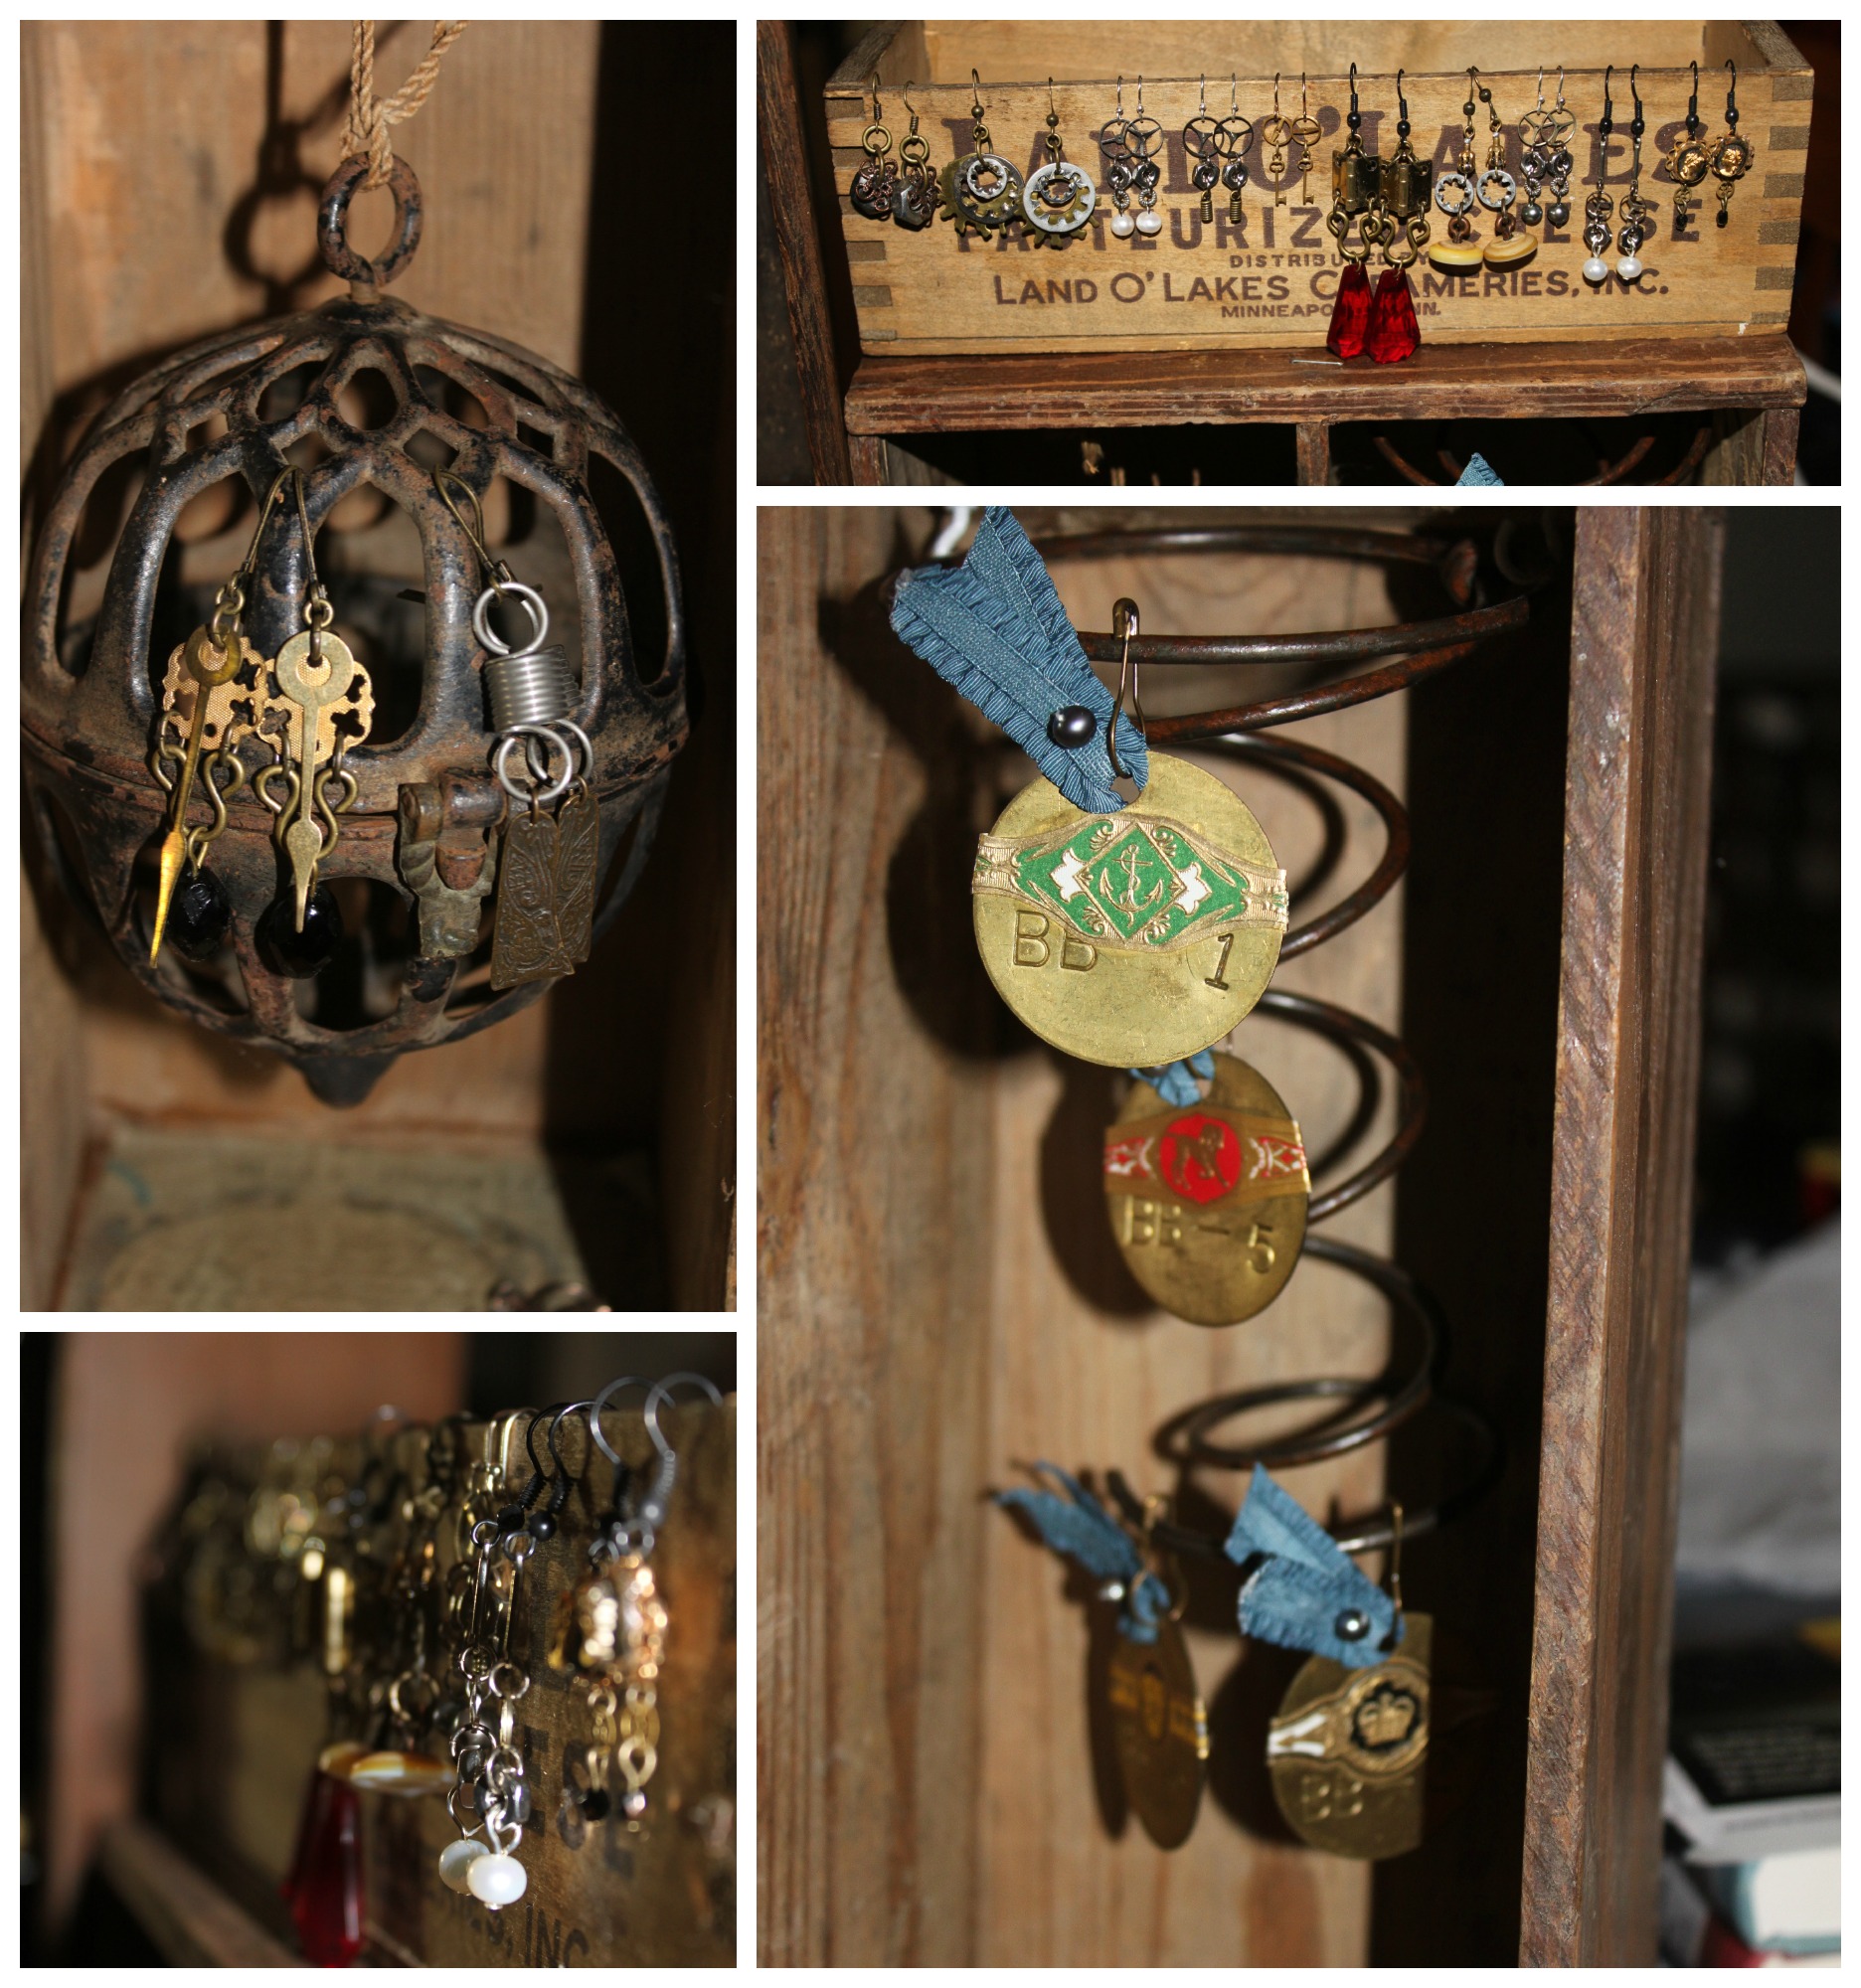
What You'll Need: 2 boxes (1 large and 1 small); 2 nails; hammer; Murphy's Oil; 3 medium-large cup hooks, or more if preferred; 1 large spring; modge podge; paintbrush; scissors; awl; map tissue paper (or regular paper) cut to fit the bottom of your box; twine; and a metal filigree globe (this can be substituted for anything else you'd like or can find that fits your box that you can hang jewelry from)
A Note on Where to Find Boxes: Flea Markets; Garage Sales; Antique Malls; and ReStores (which benefit Habitat for Humanity)--Look for sewing machine drawers & old produce crates especially. Avoid any boxes with mold, badly split sections of wood, or water damage. They will not be as structurally sound and may break with minor hammering.
Instructions:
- Clean your boxes thoroughly with soap & water (though do not soak the box) and shine up with a little Murphy's Oil. Let dry completely.
- Affix your small box on the top of your large box with your 2 nails. Hammer the nails in the bottom of the small box. Next, cut a piece of your map tissue paper to fit the bottom of your box. Apply a generous layer of modge podge to the bottom of the small box and then place the map tissue paper over it. Apply another layer of modge podge and let dry, approx. 15-20 mins. (Side note, map tissue paper, which you can find at Barnes & Noble BookStores in their gift wrap section, looks more antique when modge podged into your box than regular map paper).
- Next, cut a piece (or pieces if your large box is divided like mine) of map tissue papers to fit the bottom of your large box. Apply a generous layer of modge podge to the bottom of the box. Place the map tissue paper to the bottom of the box and then modge podge on top of it. Let dry, approx. 15-20 mins.
- Next, place your spring where you want it to hang in your box. Mark 2 spots with your pencil (where your cup hooks will go). Using your awl, create 2 starter holes over your pencil marks.

- Screw your cup hooks in place. Hang your spring from the cup hooks.

- Place your metal filigree globe in the box. Figure out where you would like it to hang. Mark it with pencil and create a starter hole with your awl. Next, cut the length of twine you need. Attach the twine to your filigree globe.
- Screw your cup hook in place. Hang your filigree globe.

- (Optional) Screw in more cup hooks for additional places to hang your jewelry. Remember to first create starter holes before screwing in the cup hooks so that you do not split the wood.
- Display your amazing product!